The most standard way to install Windows using USB Boot, Detailed instructions on how to install Windows using USB Boot most accurately
Up to now, installing Windows has become easier because many installation methods have been created. In this article, I will guide you on how to use a USB to install Windows.
 |
| The most standard way to install Windows using USB Boot |
This is the way I usually install, so I share it with everyone. There are many ways on the Internet, but I think you should use this way to install Windows most stably and correctly.
Step 1: Prepare USB Boot
You need to prepare a USB with a minimum memory capacity of 4GB or more (for Windows 10 32-bit), and for the 64-bit version, I recommend 8GB or more because most computers now run 64-bit, 32-bit is no longer popular.
Step 2: Prepare the Windows installation ISO file
You go to Microsoft's official Windows download page to download the installation iso file ( Microsoft's official Windows download page ). There are 2 ways to download the file.
Method 1: Download the Media Creation Tool . Look for the "Create Windows 10 installation media" section, click the Download Now button .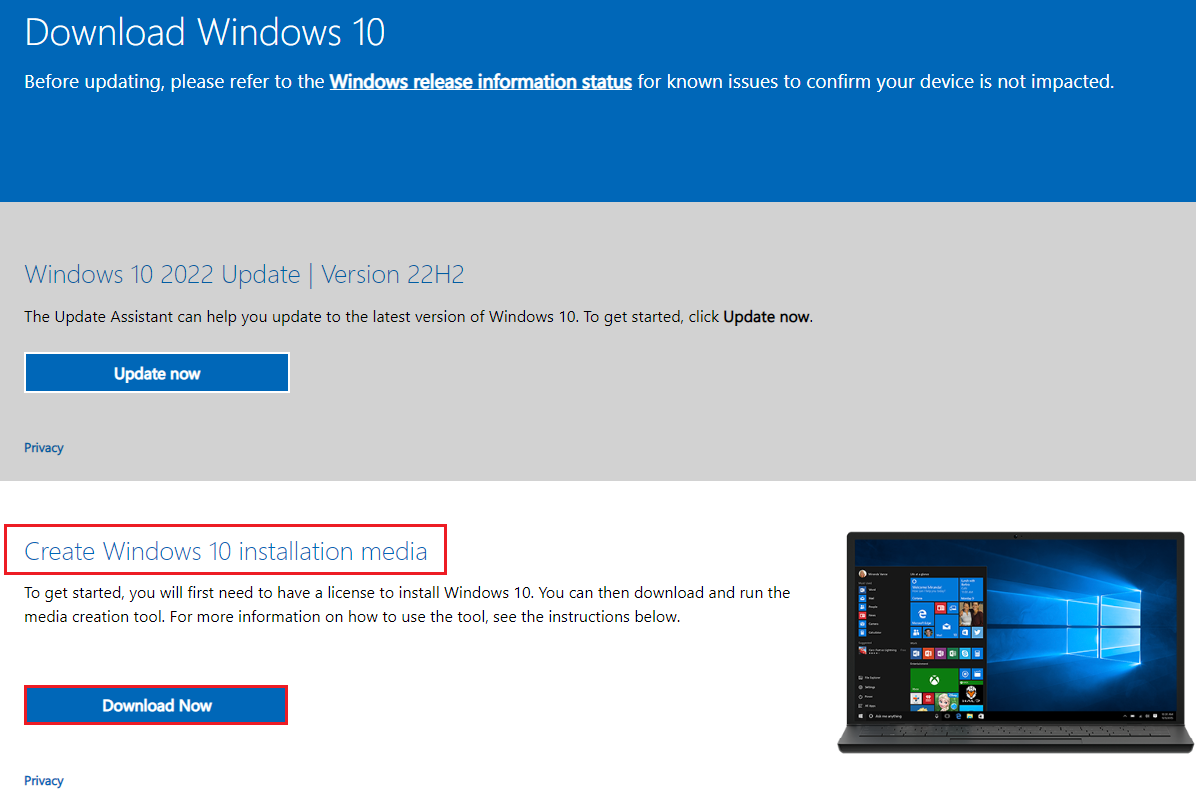
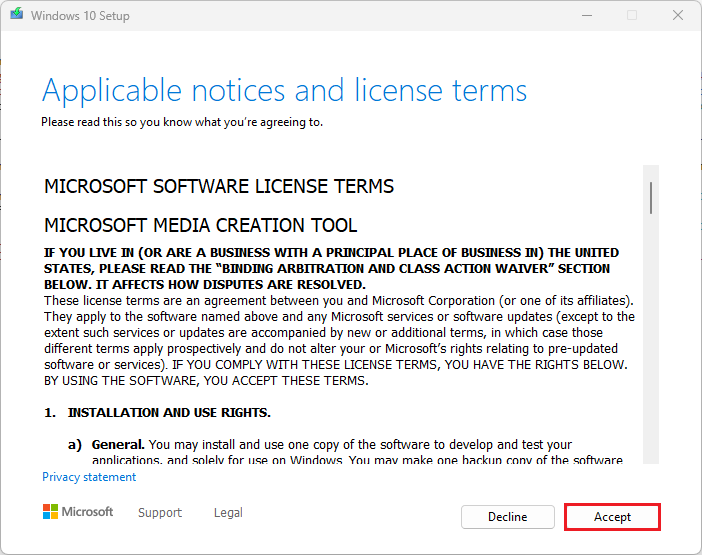
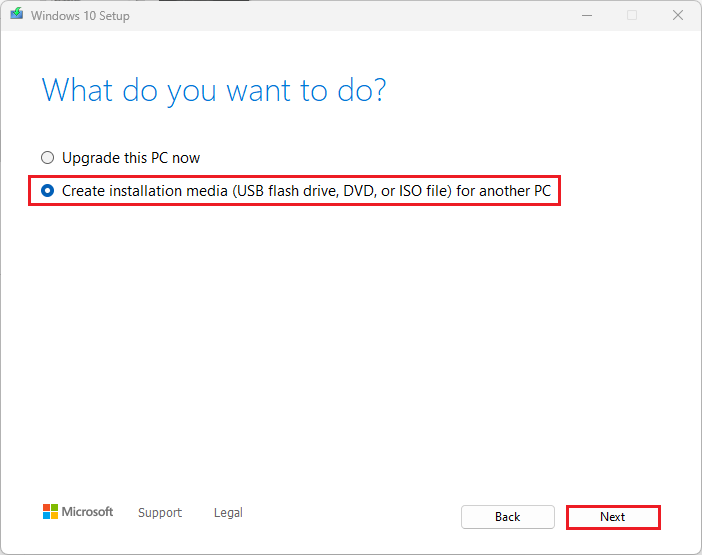
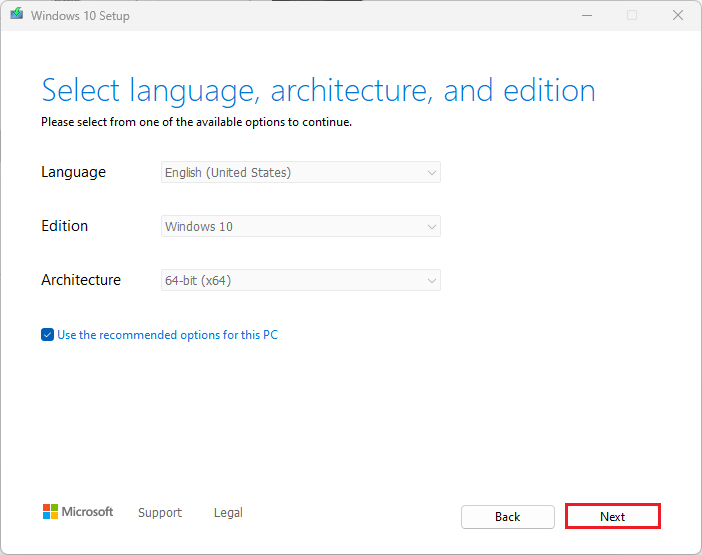
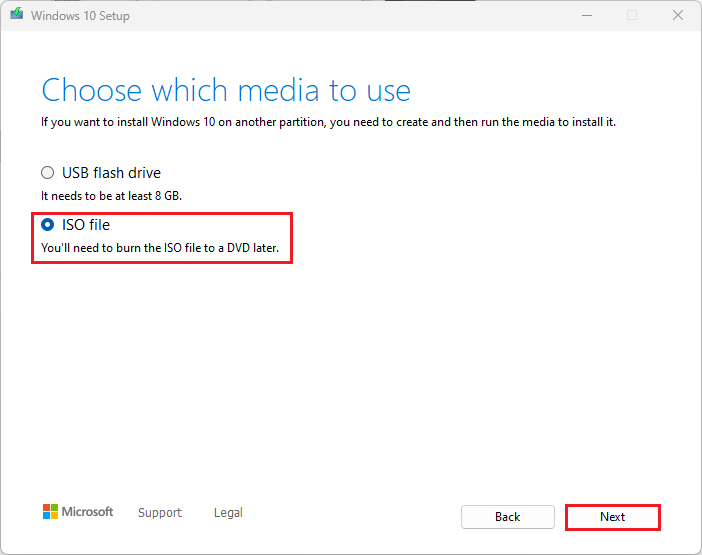
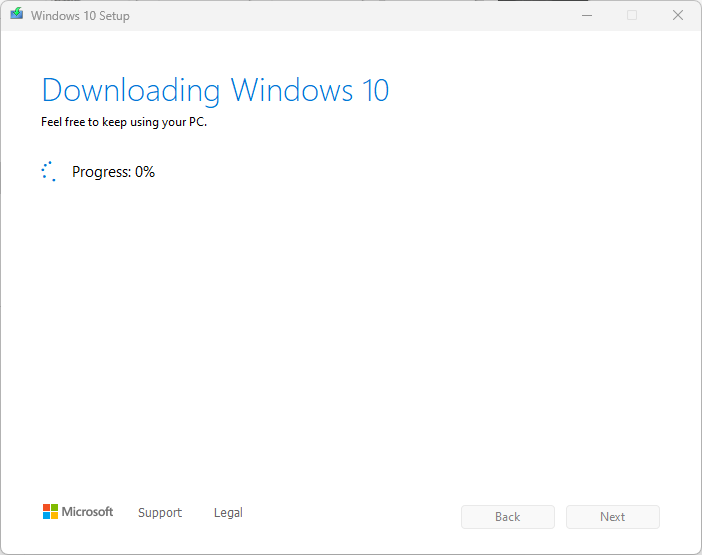
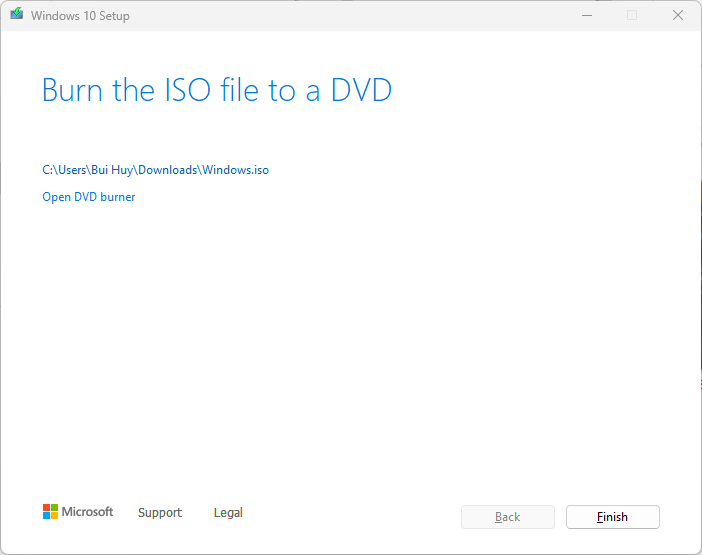
F12on the keyboard to open the Develop Tool, then press the key combination Ctrl+Shift+Mto convert the web to Mobile, reload the page as shown below, select the correct version and press Confirm step by step and download the file.
Step 3: Create Boot for USB
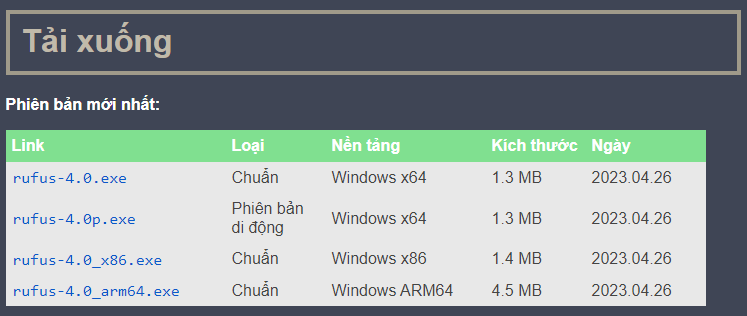
Next in this step, after having the USB, the official ISO file to install Windows from the home page, we proceed to create a boot for the USB. "Create a boot or can create a boot, load boot information for Windows to fix problems or to install Windows."You proceed to download a tool called Rufus - its function is to create a boot for USB instead of using the Microsoft tool above, link here . You can rest assured to download the latest version that their website provides, they provide us with full versions including portable versions (non-installed versions) so downloading is up to you, and pay attention to 32bit or 64 bit to suit your computer.
You open the Rufus file you just downloaded.
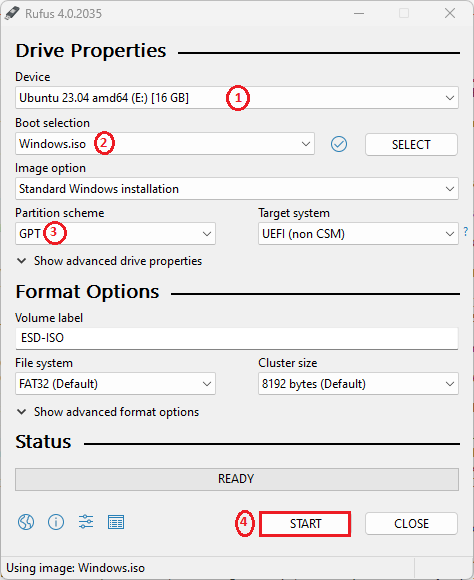
- In the Device section , select the USB that you will create boot from, so be careful to select the correct device and copy all data.
- In the Boot selection section , you select the Windows.iso iso file created in the step above (press SELECT to find it).
- Partition scheme is to choose the type of hard drive partition you want to create, for example the image above is my computer using UEFI standard, hard drive format is GPT so I choose like that. If you have not determined, please see the article below I suggest.
- After checking, click Start to let Rufus tool create boot for your USB, just wait (speed will depend on your USB).
Step 4: Proceed to install Windows
After the tool is created and reports success, restart your computer and boot into USB.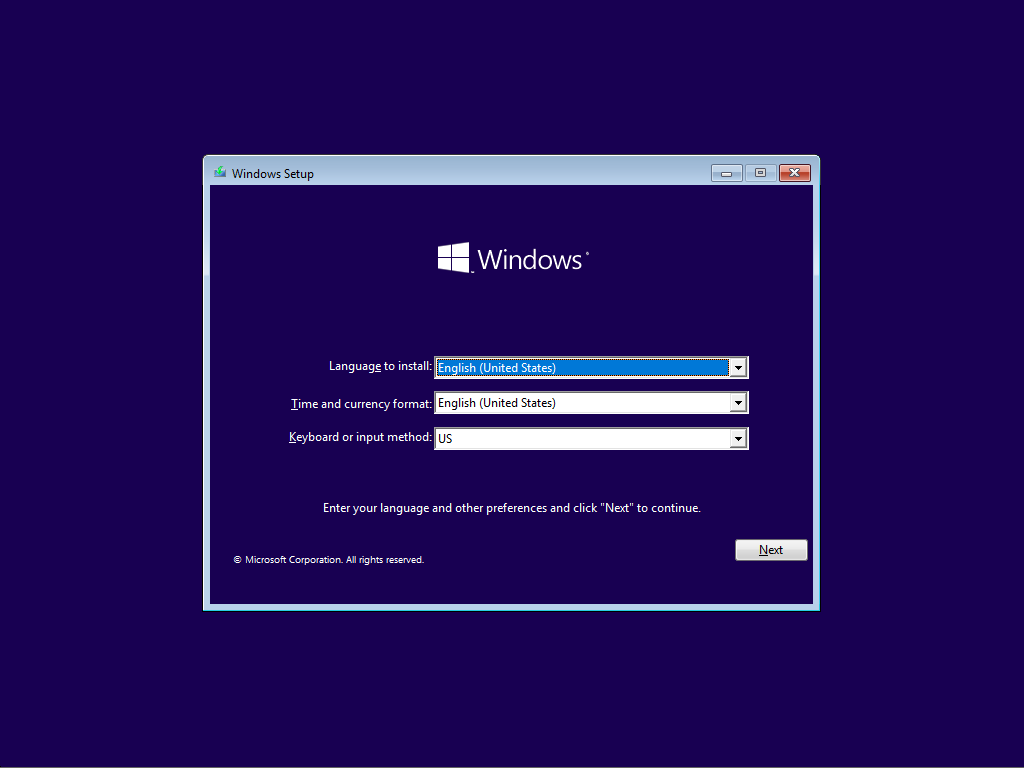
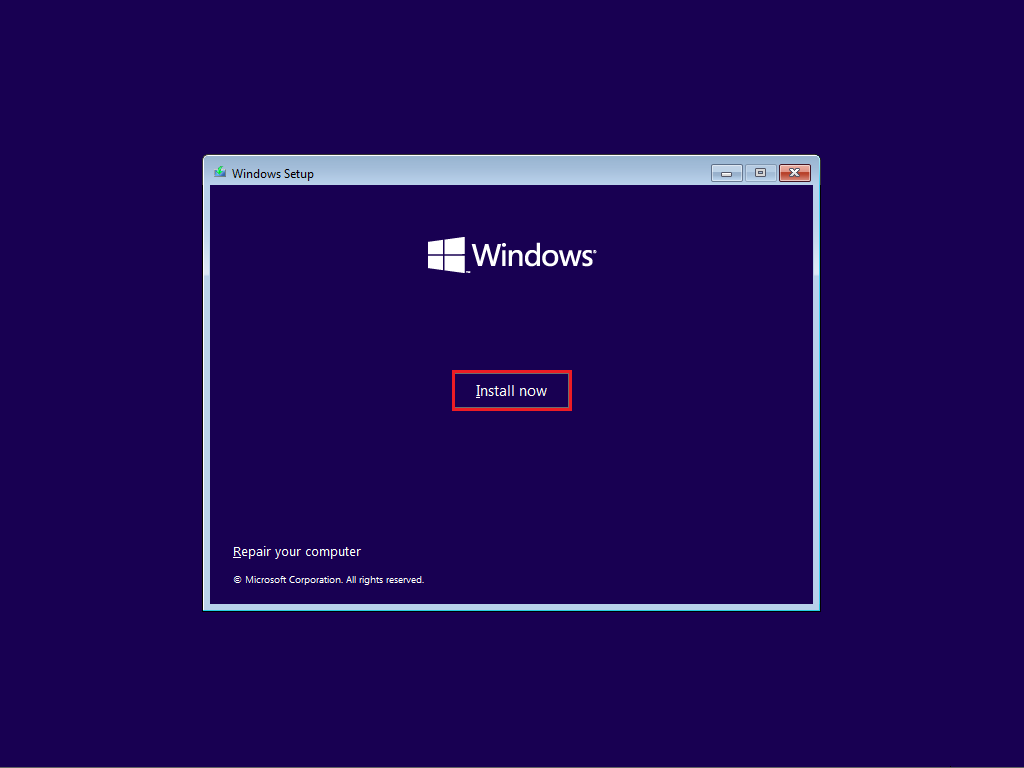
- Click Install now .
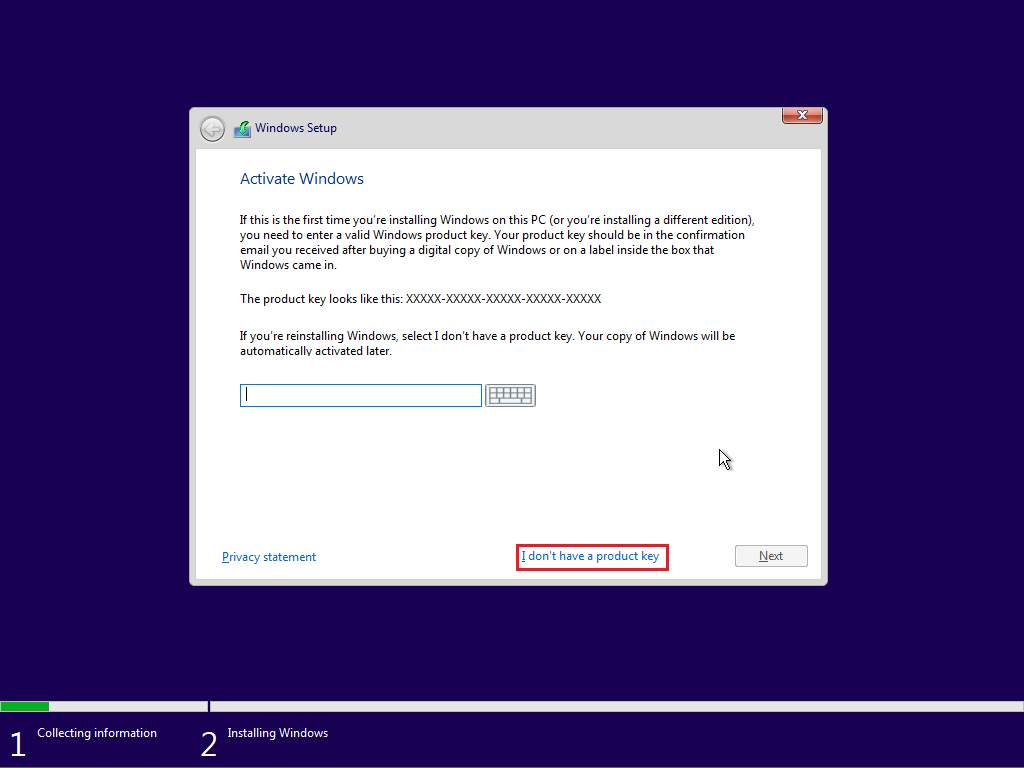
- In this step, if you have a Windows installation key (product key), enter it. If not, just click I don't have a product key to skip.
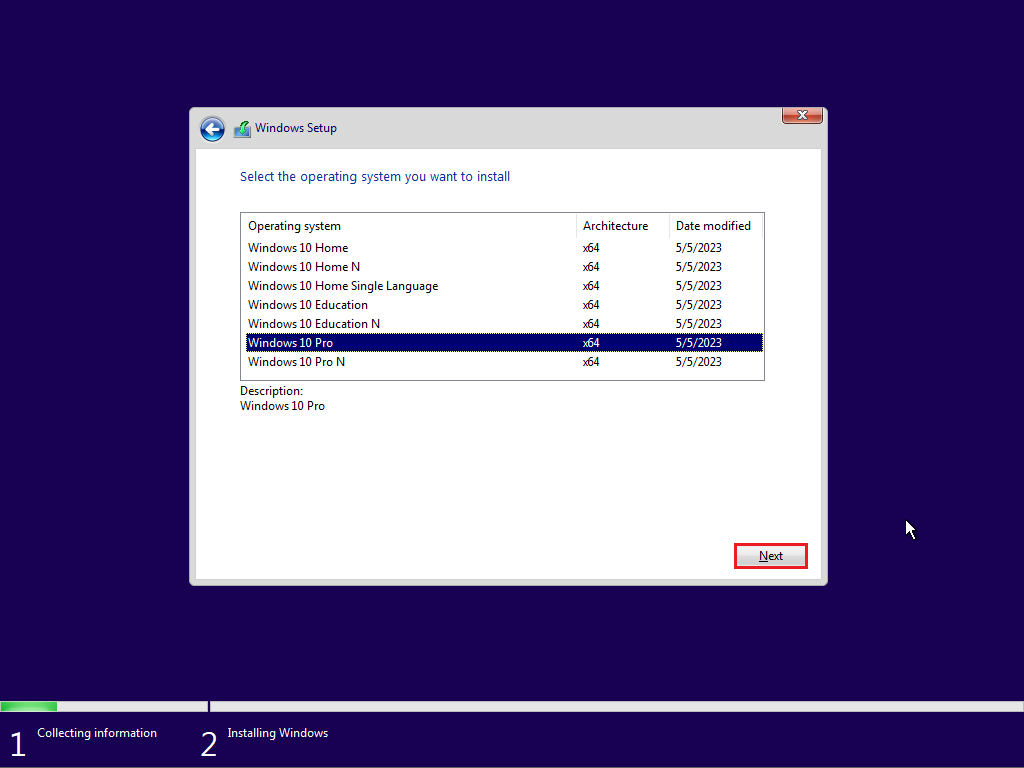
- Here, depending on your needs, choose the appropriate Windows version.
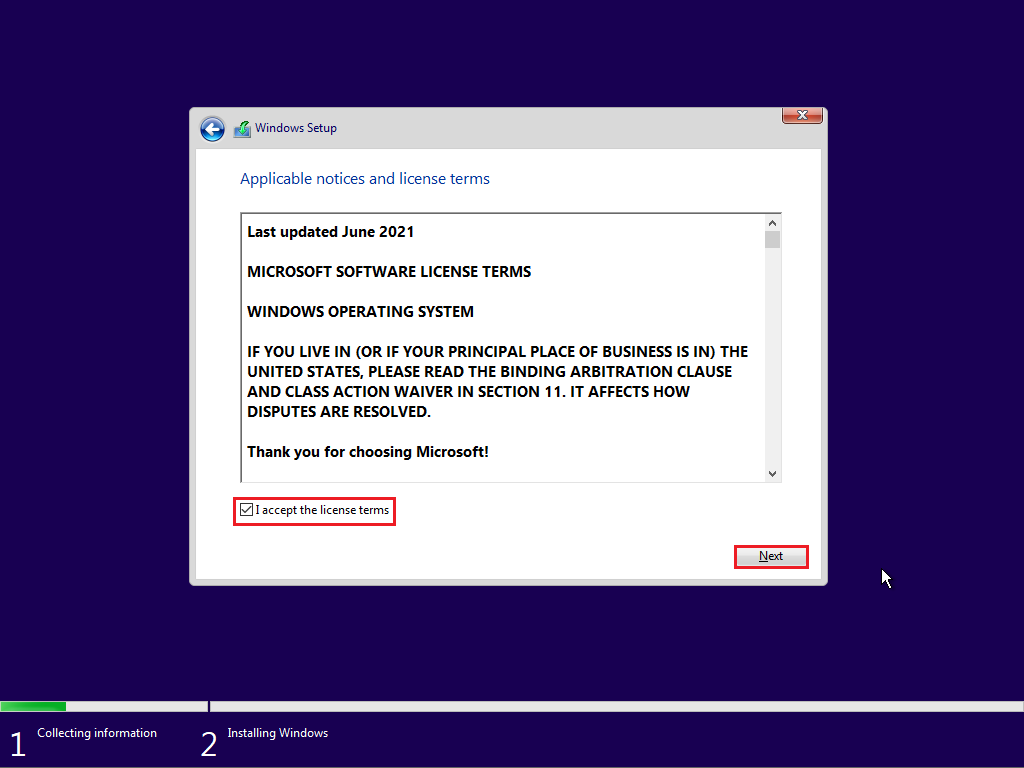
- Tick I accept the license terms , then click Next .
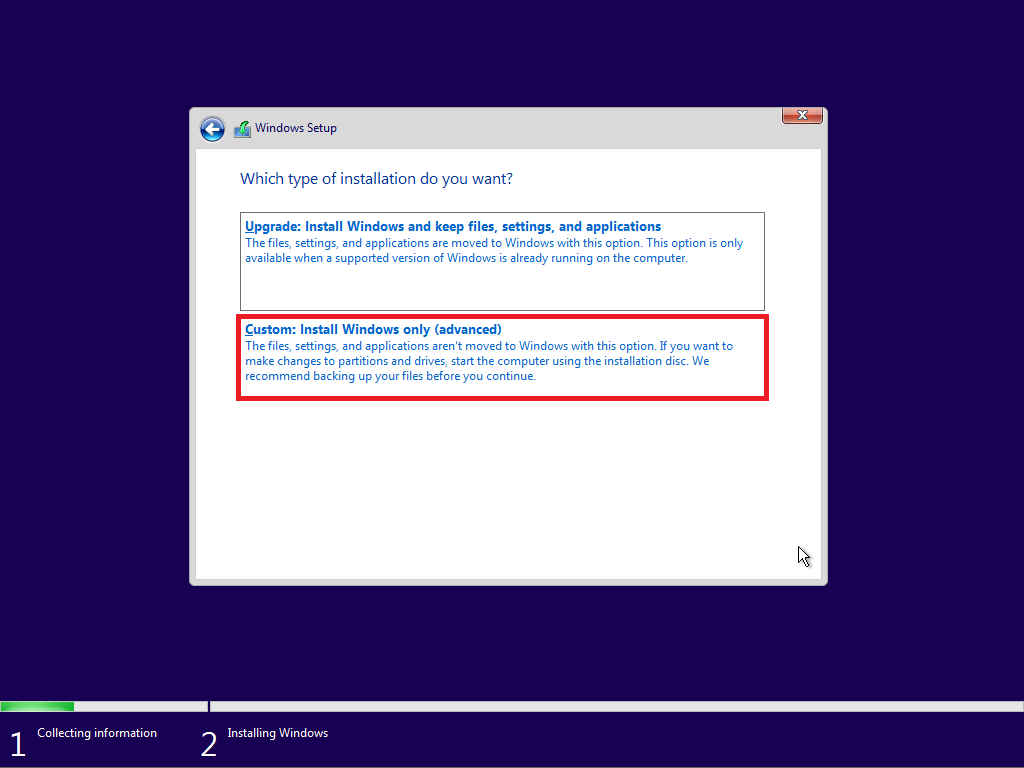
- Select the Custom line below to install manually.
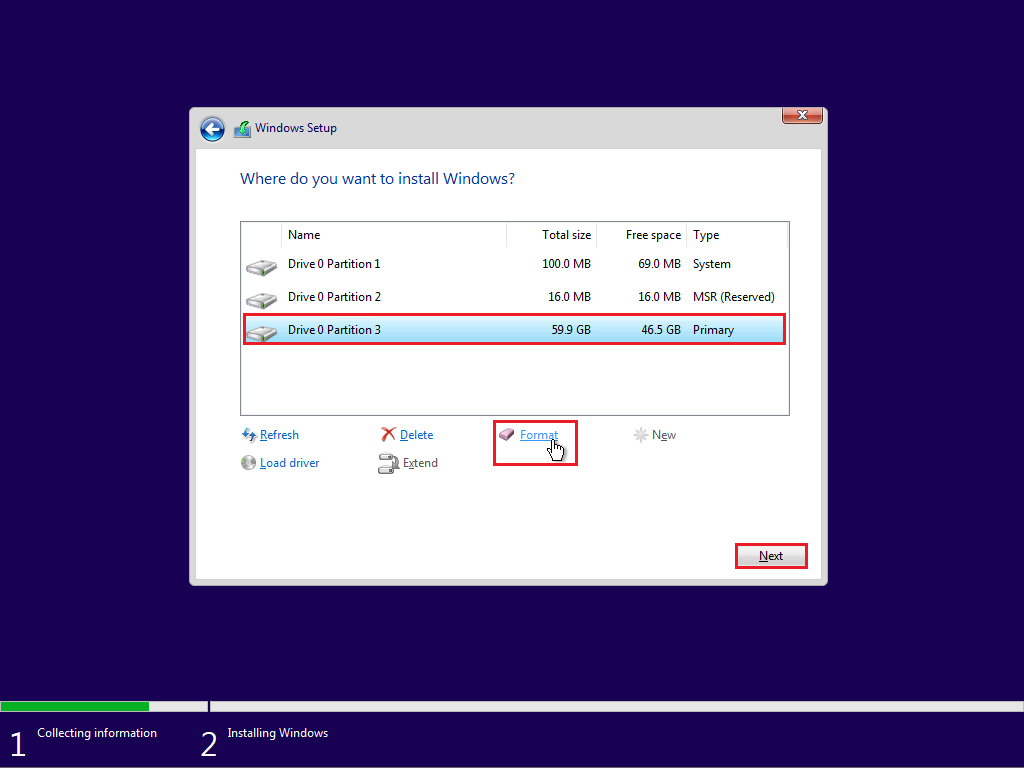
- Select the partition you intend to install Windows on, be careful with this step (tip: pay attention to the partition capacity or pay attention to the label name if any), then click Format to reformat from the beginning (delete the data of that partition to install Windows on).
- The process is fully automatic.
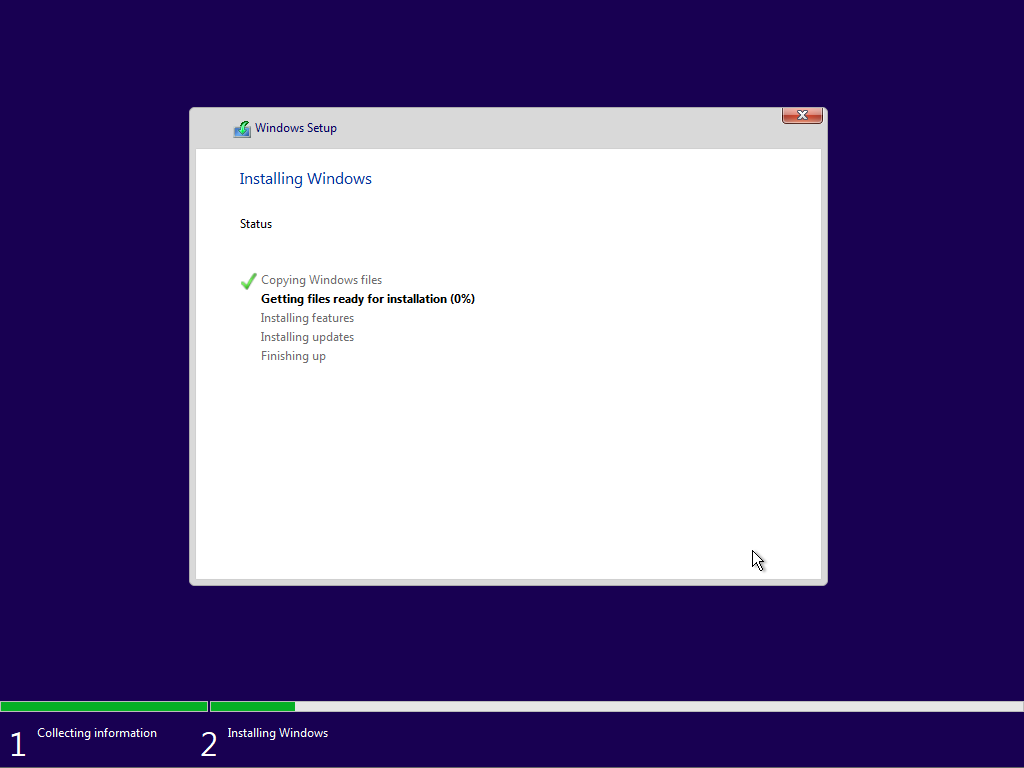
When the computer automatically restarts, remove the USB so that the computer can automatically reboot the hard drive. After running for a while, this step is called OOBE, you perform the steps below.
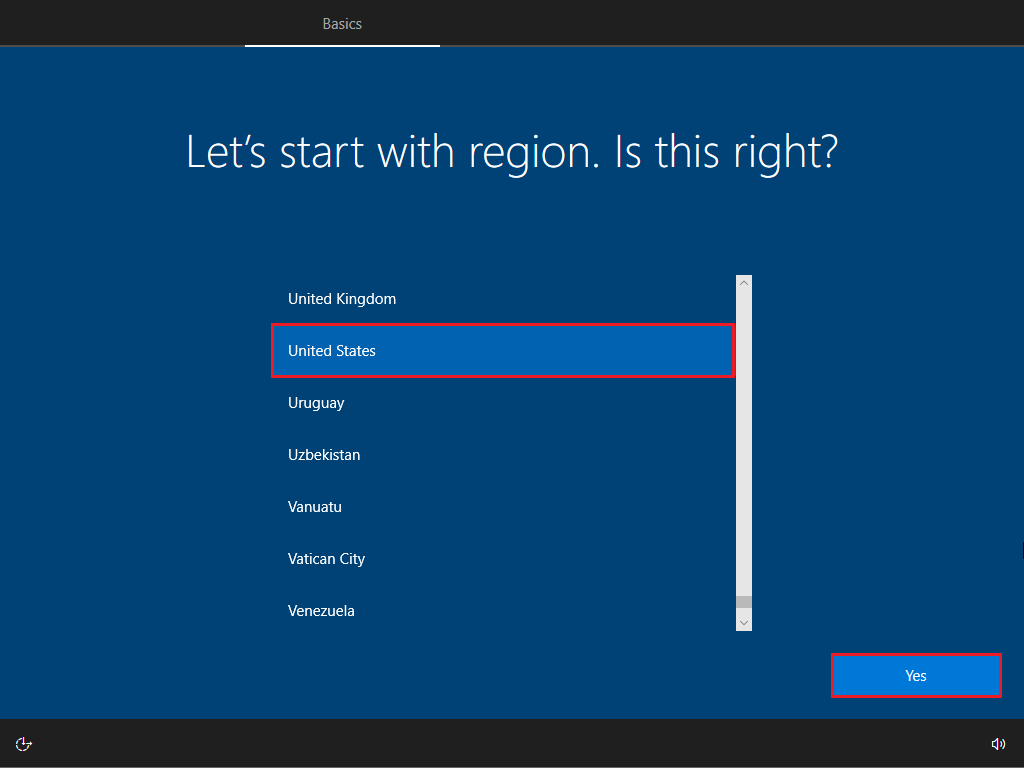
- Select region, I recommend leaving the default as United States , click Yes.
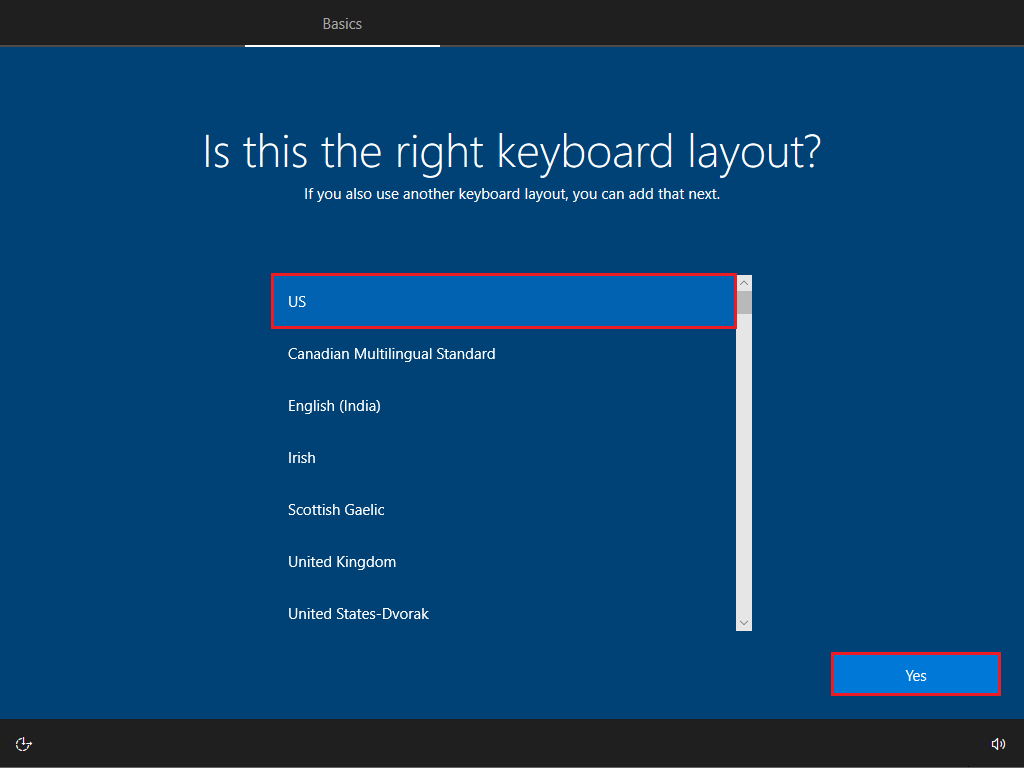
- Select Keyboard Layout, you should leave the default as US , click Yes.
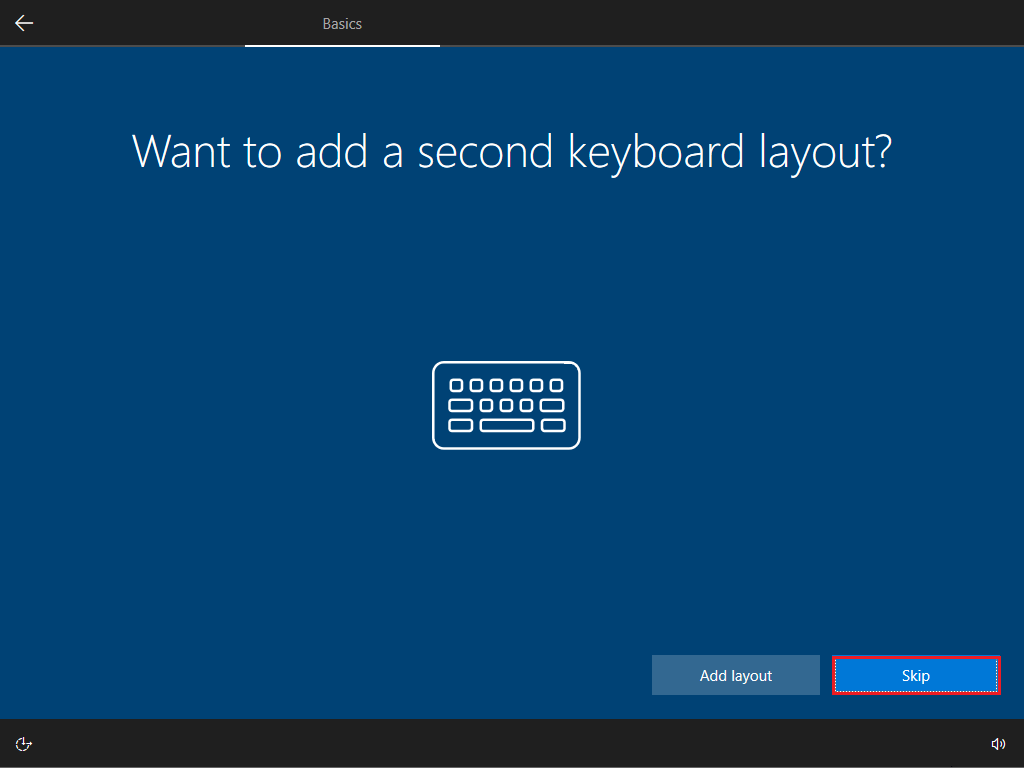
- Press Skip to skip setting up the secondary keyboard.
- Click I don't have internet to set up a Local account, or if you have internet you can also log in with a Microsoft account.
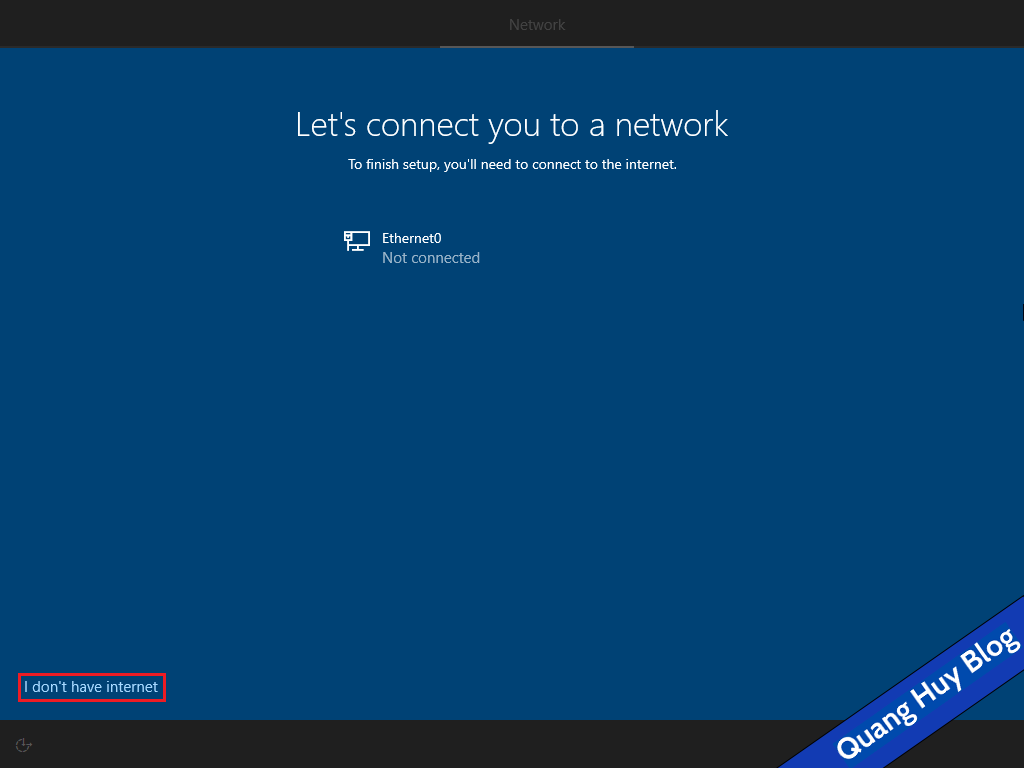
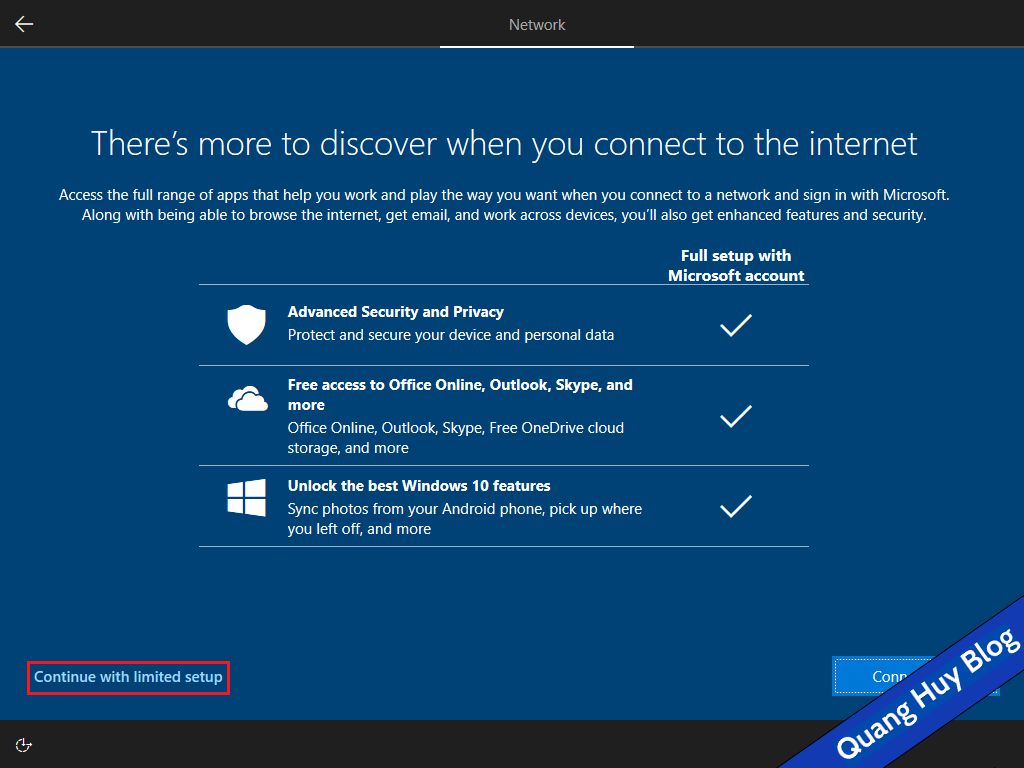
- Click Continue with limited setup .
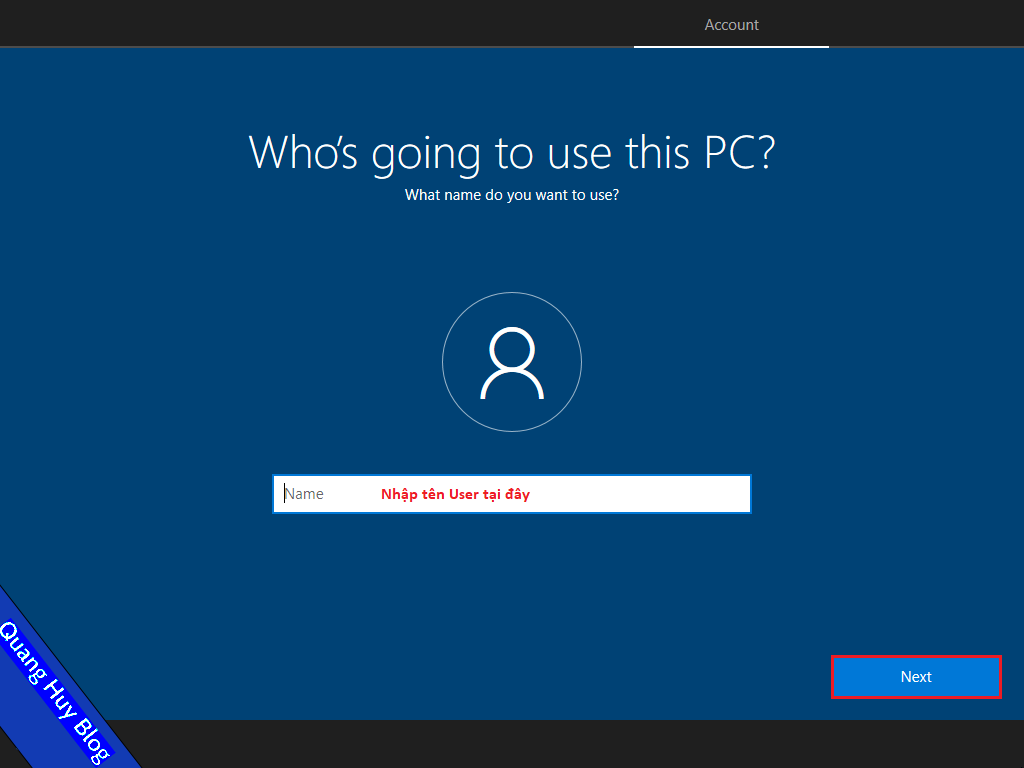
- Enter the User name you want to set and click Next .
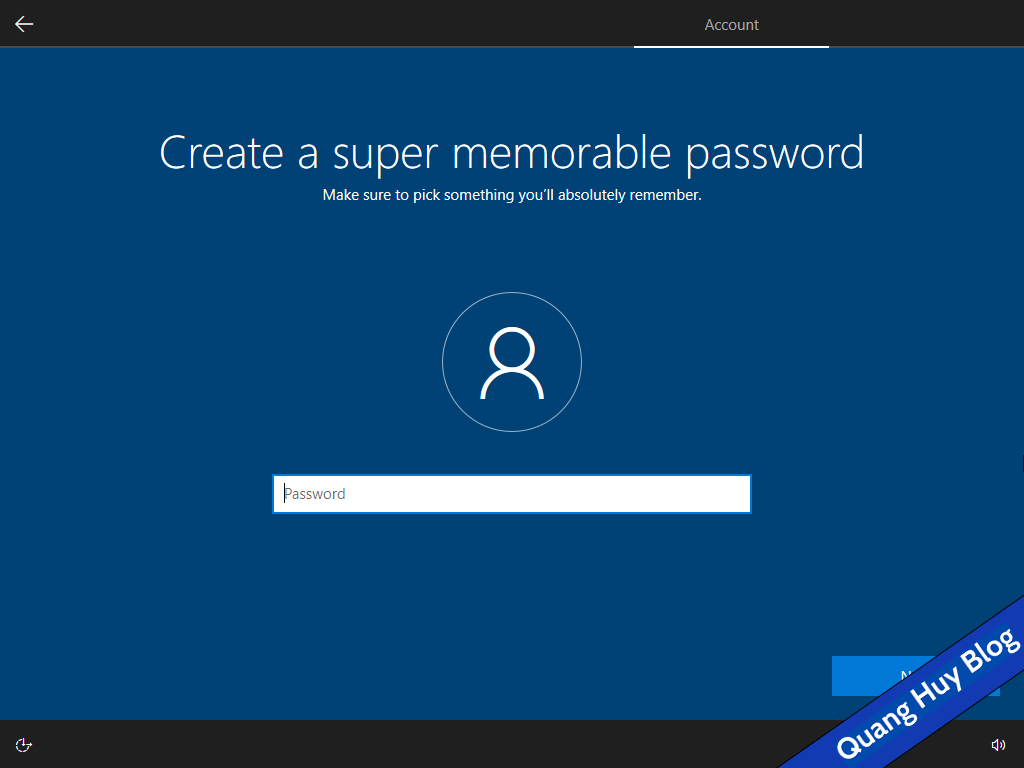
- Set a password for your computer (you can skip this step for speed), then click Next .
- Select the privacy you want to allow Windows to apply, here I turn it all off, click Accept .
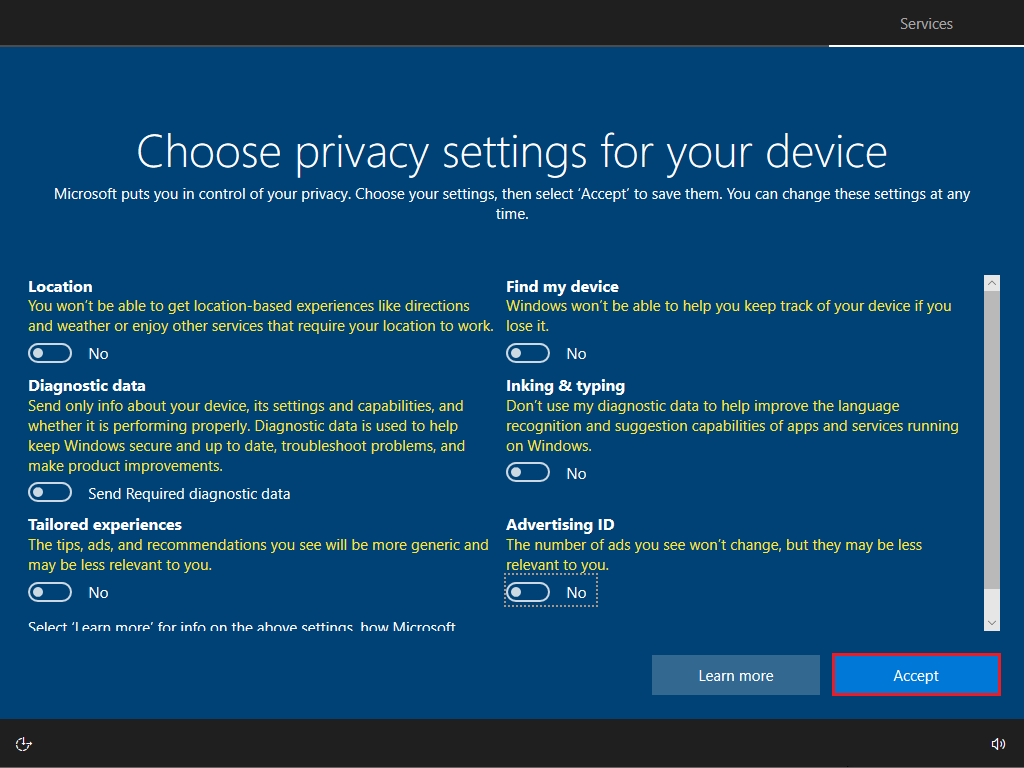
- This is up to you.
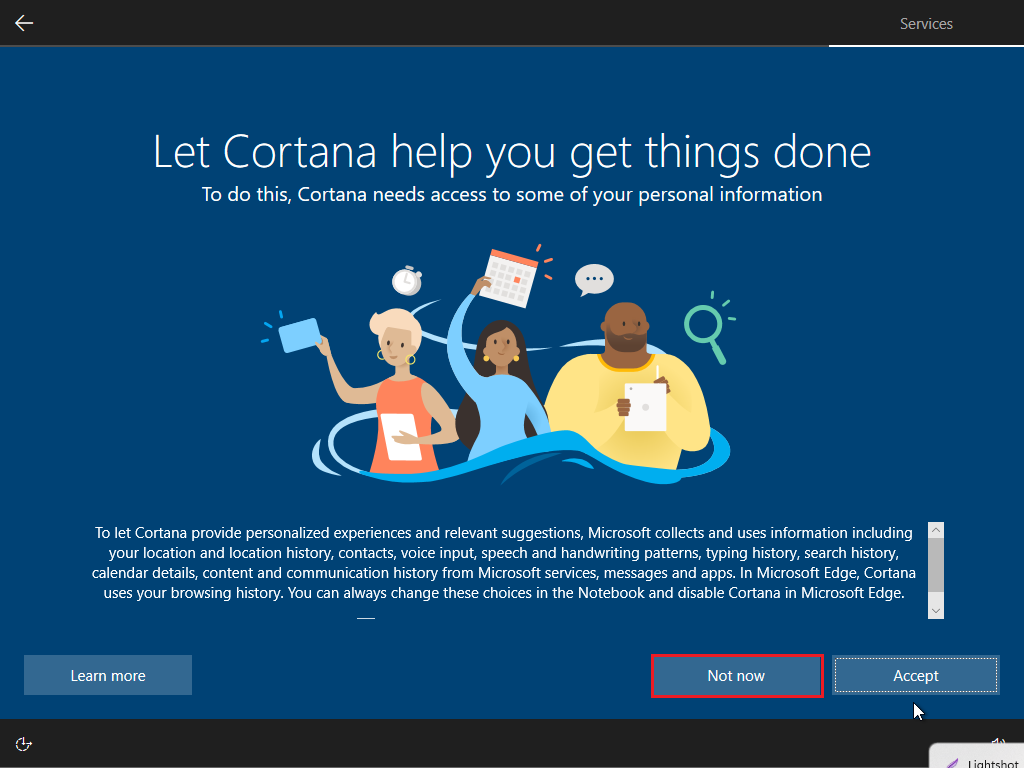

And that's all I've shared about the most standard way to install Windows using USB Boot ever. Thank you for reading the article, I wish you a successful Windows installation. If you have any questions, please leave them in the Comment section or send a message directly to Zalo/Fanpage !
